


Cleaning your blender right after using it isn’t just a chore—it’s a game-changer. Leftover food can harden quickly, making cleanup harder. Regular maintenance keeps your blender running smoothly and extends its life. Plus, a spotless blender ensures better hygiene and functionality. So, don’t wait—clean my blender today and enjoy the benefits!
Quick Cleaning Steps for Everyday Use
Keeping your blender clean doesn’t have to be a hassle. With these quick steps, you can make sure it’s spotless after every use.
Rinse Immediately After Use
Don’t let food dry inside your blender. As soon as you’re done blending, rinse the carafe with warm water. This removes most of the residue before it hardens. A quick rinse now saves you from scrubbing later.
Use Warm Water and Dish Soap
Fill the blender halfway with warm water. Add a drop or two of dish soap. You don’t need much—just enough to create some suds. Warm water helps loosen any stuck-on bits, while the soap cuts through grease and grime.
Blend to Clean the Carafe
Here’s the fun part! Put the lid on and run the blender for 30 seconds. The swirling water and soap will scrub the inside for you. It’s like giving your blender a mini spa treatment. If you’re wondering how to clean my blender without much effort, this is the trick.
Deep Cleaning Techniques for Tough Stains
Sometimes, your blender needs more than a quick rinse. Tough stains, stuck-on residue, or lingering odors can make it feel less than fresh. Don’t worry—these deep cleaning techniques will help you tackle even the most stubborn messes.
Soak with Baking Soda and Vinegar
For tough stains, a soak works wonders. Fill the blender halfway with warm water. Add a tablespoon of baking soda and a splash of vinegar. You’ll see it fizz—that’s the magic happening! Let it sit for 10-15 minutes. This combo breaks down stains and loosens grime, making it easier to clean.
Scrub Stubborn Residue Safely
If soaking doesn’t do the trick, grab a soft sponge or brush. Focus on the spots where residue is stuck. Avoid using anything too abrasive, like steel wool, as it can scratch the carafe. A little elbow grease goes a long way here. You’ll be amazed at how clean your blender looks after this step.
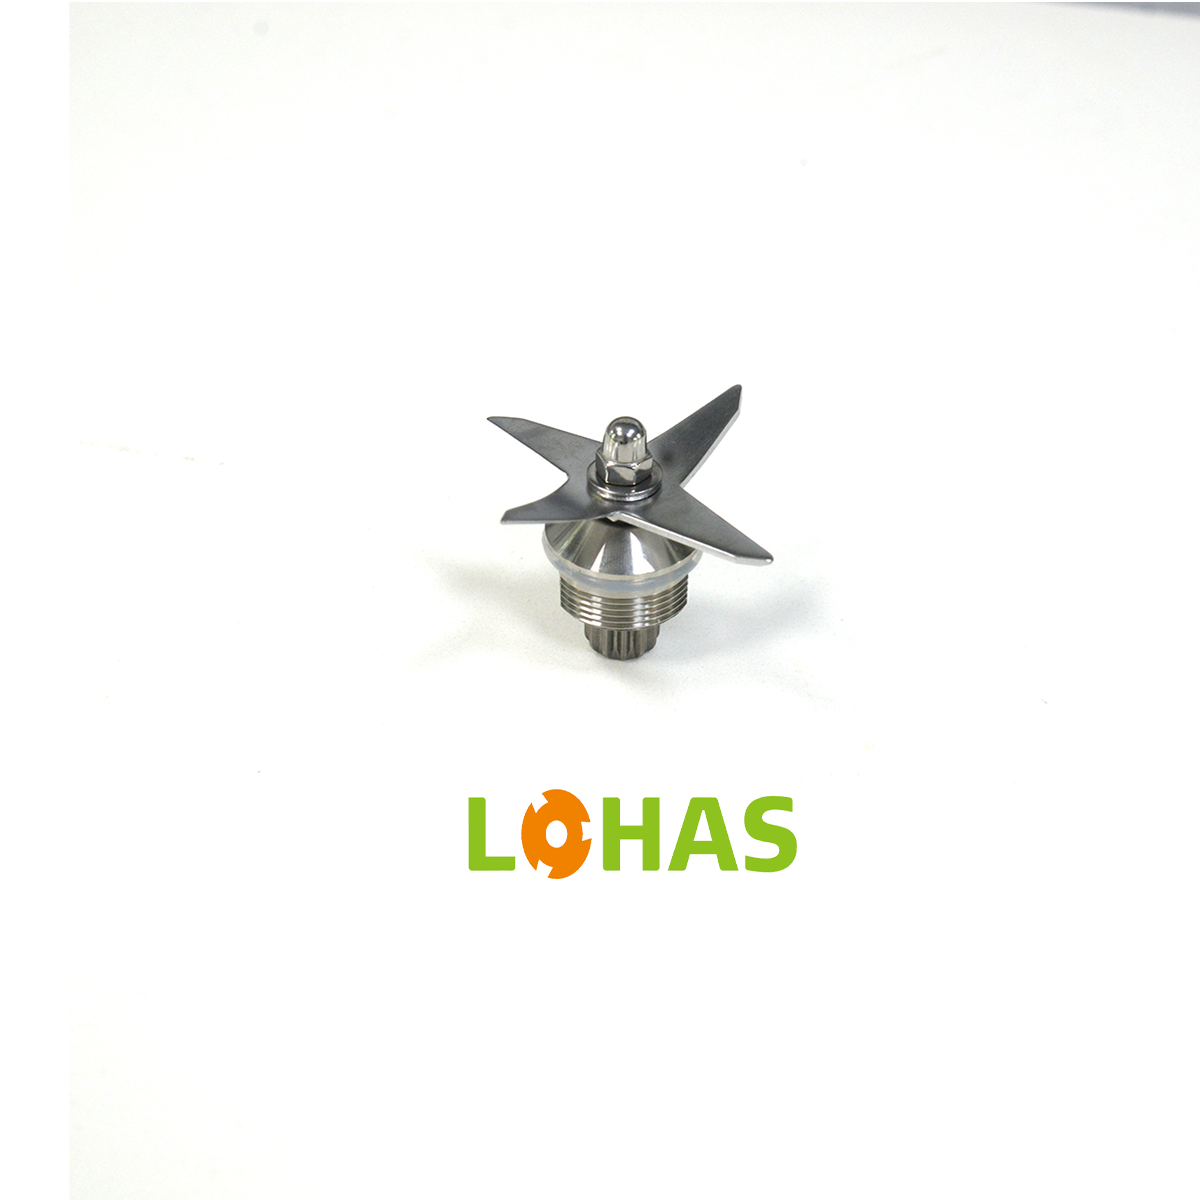
Remove and Clean the Blades
Blender blades can trap food particles, so it’s important to clean them thoroughly. Carefully remove the blades (check your blender’s manual if you’re unsure how). Wash them with warm, soapy water. Use a small brush or toothbrush to get into the nooks and crannies. Once clean, dry them completely to prevent rust.
Cleaning the Blender Base Safely
The blender base is the powerhouse of your appliance, so keeping it clean is just as important as scrubbing the carafe. Here’s how you can safely clean it without causing any damage.
Unplug Before Cleaning
Safety first! Always unplug your blender before you start cleaning the base. This simple step protects you from accidental shocks and keeps the appliance safe from electrical damage. It’s a quick habit that makes a big difference.
Wipe with a Damp Cloth
Grab a soft, damp cloth and gently wipe down the blender base. Focus on removing any spills, splatters, or sticky spots. Avoid using too much water—just a slightly damp cloth will do the trick. This keeps the base clean without risking damage to the internal components.
Clean Buttons and Controls with a Toothbrush
Blender buttons and controls can trap crumbs and grime over time. A toothbrush is your secret weapon here. Use it to scrub around the buttons and in those hard-to-reach crevices. You’ll be surprised how much dirt comes out! This step keeps your blender looking fresh and functioning smoothly.
Maintenance Tips to Keep Your Blender Spotless
Keeping your blender spotless isn’t just about cleaning—it’s about maintaining it so it works like new for years. These simple tips will help you take care of your blender and avoid unnecessary wear and tear.
Inspect and Sharpen the Blades
Blender blades can dull over time, especially if you use them frequently. Check the blades every few months for signs of wear. If they seem less effective, you can sharpen them using a sharpening stone or replace them if needed. Sharp blades not only blend better but also make cleaning easier since food won’t stick as much.
Prevent Rust by Drying Components Thoroughly
Water is your blender’s worst enemy when it comes to rust. After washing, dry every part thoroughly, especially the blades and metal components. Use a clean towel or let them air dry completely before reassembling. This small step keeps your blender looking great and prevents rust from forming.
Avoid Overloading the Blender
Overloading your blender can strain the motor and dull the blades. Stick to the recommended capacity in your blender’s manual. If you’re blending something thick, like nut butter, do it in smaller batches. This not only protects your blender but also ensures smoother results.
Cleaning your blender right after use and maintaining it regularly makes a huge difference. These simple steps keep your blender spotless and working like new for years. A clean blender isn’t just about looks—it’s about hygiene and performance. So, take a few minutes today to clean my blender and enjoy better results tomorrow!